How to set up Hikvision cloud recording on Google Drive
in Hikvision
In this guide shows how to set up a
Hikvision DVR or NVR for Google Drive cloud recording. This way, you can upload
footage or snapshot from your Hikvision DVR/NVR to your Google Drive account.
The interesting part of this kind of
setup is that you can have your Hikvision DVR or NVR recording the
videos locally and in the cloud at the same time. This ensures you can have a
backup in case something bad happens to your DVR (such as being stolen or
damaged).
If you want to record on the cloud using
Microsoft OneDrive or DropBox, consult the articles below:
• How to set up Hikvision cloud
recording: OneDrive
• How to set up Hikvision cloud
recording: DropBox
Let’s start by understanding how your devices must be connected on the network. The diagram below shows the way your Hikvision DVR/NVR needs to be hooked up. So, the DVR or NVR goes to your router and the laptop/computer is connected to the same router. All of these equipment must be on the same local network, otherwise they won’t be able to see each other.

Setting up the Hikvision DVR or NVR for
Google Drive cloud recording
Prepare the Hikvision DVR or NVR for
Google Drive cloud recording
Step 1. To
start the setup process you need to access your recorder via the web browser.
Type your local recorder’s IP address on the web browser (it’s advised to use
IE explorer) and click on the Configuration button.

Step 2. Hikvision
recorders (DVR or NVR) have two types of streams, one called Main Stream which
is the highest quality and the other one called Sub Stream is lower quality but
it gets uploaded faster on the cloud.

By default, Hikvision systems use the
Sub Stream mode to send data to the cloud (Google Drive, OneDrive or Dropbox).
Click on the Video/Audio and select the
parameters of the recordings that will be uploaded on the cloud.
You can change the Resolution, Video Quality, Frame Rate or the Bitrate Type (leave it as “Variable” to have a
smoother transmission). You may need to play with these settings until you find
the right balance that works better in your case. The lighter the feed the
faster and smoother gets saved in the cloud.
Step 3. Set
your recorder to record on Motion Detection. By far, this is the best way to
record on Google Drive. If there’s motion being detected under the camera, the
system will trigger the recorder to start recording.

To enable the Motion Detection, go to
the Basic Event section on the enable the motion detection box for each camera
you intend to record into the Google cloud. Additionally, you can also select
the area that triggers the motion detection event and the sensitivity.
Also in the same section, make sure
the Arming Schedule is set up properly, meaning select
the day that you want the motion detection enabled. If it’s all blue, it
indicates that it is enabled. Depending on your setup, you can arm the motion
detection for certain time frames only.

Step 4. In the next step you need to set up your recording schedule on the Hikvision DVR or NVR. Go to the Schedule Settings and enable the recording for the camera based on Motion or Event. You may need to try both of them to see which one works for your recorder.


On the next window, change the Stream Type to Double Stream. This step is
crucial, you need to select the Double Stream type otherwise the videos will
not get uploaded to Google Drive cloud.
On the same window, additionally you can
choose the Pre-record and Post-record time which the time after and before the
event is recorded. Let’s say, record the footage 5 second before the motion is
detected and 5 seconds after the motion finished.

Set up Google Drive cloud recording
After the recorder has been prepared,
you need to set up the recorder to work with Google Drive. Open up the Storage Management menu and click on Cloud Storage.
Choose the Cloud Type for Google Drive.
To make things work, it’s necessary to use an Authorization Code.
So, choose Google Drive as the Cloud Type and click the “Get”.

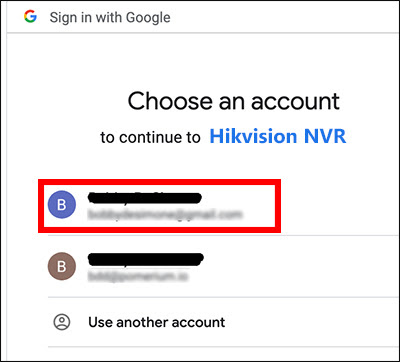
By following this step, you authorize
Google Drive to create files and connect to your Hikvision DVR or NVR system.

Click the “Allow” to let the Hikvision
recorder communicate with your Google Drive account. On the next window, you’ll
see a long code which is used to authorize the application (which is your
Hikvision DVR/NVR ) to access your Google Drive. Copy the code.

Paste the code to the Authorization Code
field. You should see a green tick icon which indicates the code worked
correctly.

You have to wait at least one minute for
the status to change from offline to online. Keep refreshing it, until the
status turns online. Once you see that, it means that your recordings are
starting to get uploaded to the Google Drive cloud.

Stored recordings on Google Drive cloud
You need to wait for a few minutes until there’s motion under
the camera (or simply wave to the camera). Once the software is triggered, the
motion recording will be automatically uploaded to Google Drive.
All the Hikvision recordings backed up to Google Drive cloud
will be grouped on separated folders following the camera name and the date. So
each camera and date will store the recordings on a specific folder created to
the Hikvision DVR/NVR to Google Drive.
For example you can find the videos on My Drive > record > 20200207 > A1. To make things easier, you can play these videos straight on Google Drive, simply double click the footage and it will be player in-browser.
Ref : https://securitycamcenter.com/hikvision-google-drive-cloud/
เปรียบเทียบราคา Cloud *** เป็นราคาพื้นที่/เดือน
ระบบ Cloud ที่รองรับระบบกล้องวงจรปิด NVR Hikvision
-
Google Drive
-
Microsoft One Drive
-
Dropbox

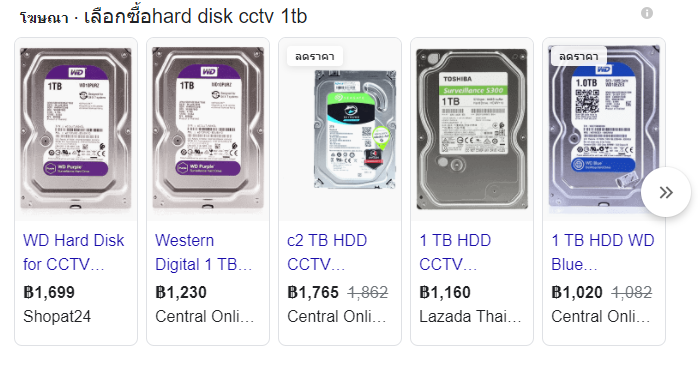
ราคา Hard Disk สำหรับกล้อง CCTV


คำนวณจำนวนวัน ต่อ พื้นที่การบันทึก ของกล้อง CCTV

Ref : https://www.neonic.co.th/daycalculator.html
หมายเหตุ
The interesting part of this kind of setup is that you can
have your Hikvision DVR or
NVR recording the videos locally and in the
cloud at the same time. This ensures you can have a backup in case something
bad happens to your DVR (such as being stolen or damaged).
#1 Website Software Easy to Free Download
ตอบลบDownload Hik-Connect for PC for free with a direct link (2026)